This video shows some Research Lab props and interactive devices. The Charging Station in the middle of the room is a WIP. A custom camera, sound, some animation alignment code and energy particle FX would be a good second pass, as well as some improvement to the timing of the events. Some of the other items here will be usable, like the 3D Printer on the side or the generators in the next room.
Electrifying!
It’s been awhile since I posted last. Wearing so many hats has meant multiple learning curves, but finally some results to share! Camera and Player control, Shaders, Particle effects, Reflection probes, Lighting, building Environments and Props, UI elements, Scoring the game, Animating, and Coding…the list is long. I’ve added a few videos to my instagram account, check them out! Comments welcome.
Animation Idles
At this stage the character has been modeled, textured and rigged.
His blinking eyes are done with a sprite sheet and a few lines of C# code to play each frame in a sequence. The texture is emissive, so it will glow in the dark. I’ll need to write some code to swap textures based on animations, moods and game states, but that will come later. for now It’s great to see him come to life!
Running an idle animation is easy enough, but it was a little harder to find some info on randomizing idles. A big thank you to GameDevDad for posting a working example of the code required! I’ve just started learning C# and this was a big help.
After a few more animations to test the rigs limits ingame, I’ll need to study how it looks in Unity and fix any bugs I find. Later I’ll take a crack at the smear animations i’d mentioned before, as it involves some re-rigging. That will be a good point to make revisions. I’ve already noticed that the arm sockets have a habit of flipping around even though they are constrained (gimbal locking), and i’m seeing some tiny movement in the feet when they should be locked down. Fun!
Rigging and Skinning
It is CRITICAL to get the scale right BEFORE you begin this stage. You have been warned. Many issues can be introduced if you try to resize things later. I grabbed the default Ethan asset from Unity that is already scaled to the world size and base my scale off of it.
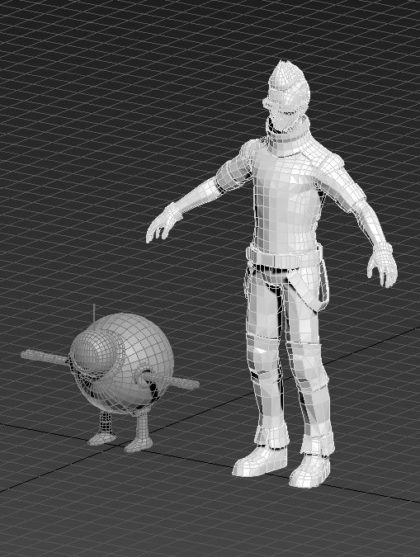
To get the character animating you need to create a skeleton and bind the model to it. You position the bones in 3D inside the model and then use a skin modifier to assign weights to the verts.

Here’s a link on skinning a character in 3Dmax. Again, there are many of these tutorials available online for whichever program you decide to use. I found this guy to be clear and thorough.
The setup for my rig is simple, to test out the range of motion.
Exporting to the FBX file format allows the character to be transferred between programs. Unity uses them directly, and maintains the structure for an easy workflow. Takes are stored as animations, which can be used in the mechanim system with drag and drop functionality.
Modeling and Texturing
With a character design ready to go it’s time to start modelling.
There are many programs that will do the job, like 3Dmax, Maya, Zbrush, or free options like Blender. There are tons of tutorials online to learn this stuff, even if you’ve never done any 3D. Though the learning curve is pretty steep if you’re new to 3D, stick with it! it’s very rewarding to finish a sculpture and fun to animate them!
One thing I’d suggest is going through every menu option (at the top of most windows programs) in the drop downs just to see what’s there. I do this for any new program I’m learning before even touching a manual. It helps to know what’s hidden in those menus and can save a lot of frustration down the road. Focus in on the few things you’ll actually need, like making and combining primitive shapes or how to control surfaces with verts and polygons. YouTube is your best friend when it comes to learning this stuff. And it’s free!
Here’s the first pass of my little robot guy after some UV editing. The checker pattern is to see that the texture mapping will be free of distortion.

Next up Textures!
Things have come a long way over the years, making the texturing process a lot less painful than it used to be. Quixel and Substance Painter are the new go to’s for adding surfaces to your models.
I’ll be doing things in passes, improving on the textures, rigging and modelling as I go during this early R&D phase. After a quick texture job here is the model imported into Unity. I’ve added the outline shader I was playing with in an earlier post just to see how it looks.
Success!
Animation Style
Research time! Looking at a lot of Anime gifs lately.
Reminds me of how much I love motion. I’d like to incorporate this where possible, mixed in with a more classical animation style for the character moments. There are a couple of hurdles to achieving that look in 3D I’ll need to solve. Time for some Technical Directing!
- Rigging the model for Squash and Stretch scaling.
- Smears on fast motion.
- Secondary motion/action
Squash and Stretch:
This is a high priority. The first tests I imported to unity scaled the child bones as well as the parent. I haven’t found a good solution yet for this. Counter scaling the child bones to compensate seems like it would have some hidden problems. I remember many issues with scale in the past. Stay tuned for the results!
Smears:

Blendshapes and bones would both work (and maybe some extra geometry). I’d like to have total control of each frame. I’m going to test Vertex Shaders and see how far I can push things. I purchased ShaderForge to test this out. Not cheap but it seems like I’m going to need it for a lot of things.
Secondary Action:
The delay of extra parts like clothes and hair can really enhance the realism of motion as well as add some flair. I’ve incorporated some robot parts that will work for my character. His head bob, antenna sway and telescoping robotic arms will all help. I considered automating these features with physical simulations, but i’m having fun doing it by hand, and the added control is a bonus.
Visual Style 1.1 – Toon Shaders
To achieve the look of the 2D concept I’m going to need to sort a few things out.
- Edge detection for the cartoon outlines
- Textures or a Toon Shader
Edge Detection:
The default Triangle Depth Normals seems to work well. Once I’m creating environments i might need to revisit this solution. a custom shader might be necessary, but we’ll see. I’m noticing some extra edges being drawn that I think can be handled with some mesh edits. but I’ll need to test this theory.
(edit. that was it!)
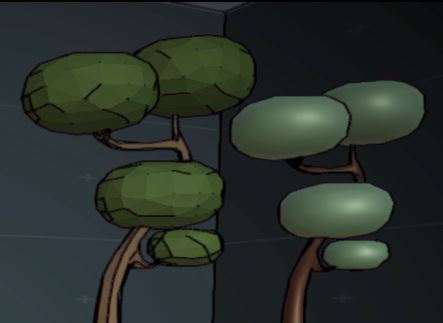
Texture/ToonShader:
Looking into the various free options online, I tested a few out in unity to see which ones looked like they might work. I didn’t like a lot of the free options for various reasons, one being the way 3D Toon Shaded objects react to light while moving.
https://forums.unrealengine.com/attachment.php?attachmentid=39594&d=1431721699
I’ll do some texture work to keep things grounded and dirty, and since toon shaders can still work over them it seems like the way to go. I’ll revisit this once i have an environment built, to see if everything meshes well together. I’ll probably need to dig into shader code at some point or at the least some tutorials for ShaderForge, but I have a lot of things to do before I get there.
Some additional links:
https://en.wikipedia.org/wiki/Cel_shading
https://en.wikipedia.org/wiki/List_of_cel-shaded_video_games
Visual Style
I’ve spent some time thinking of the visual style, tossing ideas around. An animation driven game with some old school gameplay characteristics needs a look to match. Will it be 2D isometric or full 3D? Will it be hyper realistic or pixels? For now I’ll follow the design priorities I’d set out while making the player. The first images I’d drawn were all 2D cartoon style so I checked online for what people are using for hand drawn games. After watching a few videos on YouTube I did a quick test using Esoteric’s Spine program (note* demo version does not save). It allows you to rig a drawing and easily animate it with a kind of 2.5D.
Happy with the results but after some internal debating, a 3D model would be more flexible for the various game modes I’ll be making. I’ll create a 3D version while trying to maintain the look next.
Sketching out a Player Character
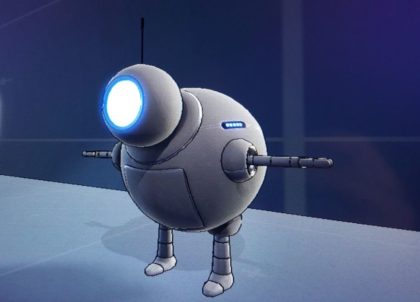
I’m interested in doing some keyframe animation for this project, so I need a character that will work well with that technique. I love old school cartoons like The Roadrunner, with their humorous squash and stretch anims. With this in mind I added things like dangling arms, and an antenna that sways with secondary motion. I did some sketches to work it all out, and came up with this little guy!
There are a lot of slick designs out there. I’m actually getting tired of seeing badass robots, so I went for cute and expressive. His silhouette is simple and readable. His face is a screen which can display his emotional state. I could use this to indicate game state changes as well, though i assume it won’t be visible all the time.
Some decisions need to be made regarding his anthropomorphic characteristics. I’d like him to act human, while still having robot tendencies (whatever those might be). I find it interesting that we are so devoted to recreating ourselves as a species… Automatons, Androids, Life Model Decoys.
Unity and Online Learning
After deciding to use the Unity Game engine known for its flexibility and wealth of support, I looked around for some tutorials to get started. Installing Unity took a couple of minutes, and it’s laid out in a very intuitive and user friendly way. I’ve used some pretty bare bones tools during production, and it was impressive to see how much effort went into making things accessible.

I recommend checking out this online game development course from Michigan state university. https://www.coursera.org/learn/game-development. The course is free to audit, and it got me up and running with the Unity environment in hours. There are lots of tutorials online as well, though there is a lot to sift through out there. I’ll post a list of ones I found useful on the sidebar when i get a minute to organize them.
